Tagging
Previous | Next | Guide to using Git with GEOS-Chem | Getting Started with GEOS-Chem | GEOS-Chem Main Page
- Introduction to Git
- Installing Git
- First-time Git setup
- Cloning (i.e. downloading for the first time)
- Ignoring files
- Viewing the revision history
- Using Git GUI
- Branching
- Committing
- Tagging
- Merging
- Receiving updates (aka pulling)
- Using patches to share your updates with others
- Advanced Git usage
- Git and Github tutorials
Overview
On this page, we describe how to add tags to individual commits.
Tagging
Git allows you to tag a particular commit with an alphanumeric string for easy reference. This tag can be used with git pull, git checkout, etc. commands in the same way as for branches.
Each commit corresponding to a GEOS-Chem version release is tagged with the version number (e.g. 12.3.2).
Create a tag using Gitk
You may also add a tag via the gitk viewer utility, as follows:
(1) Start Gitk.
gitk --all
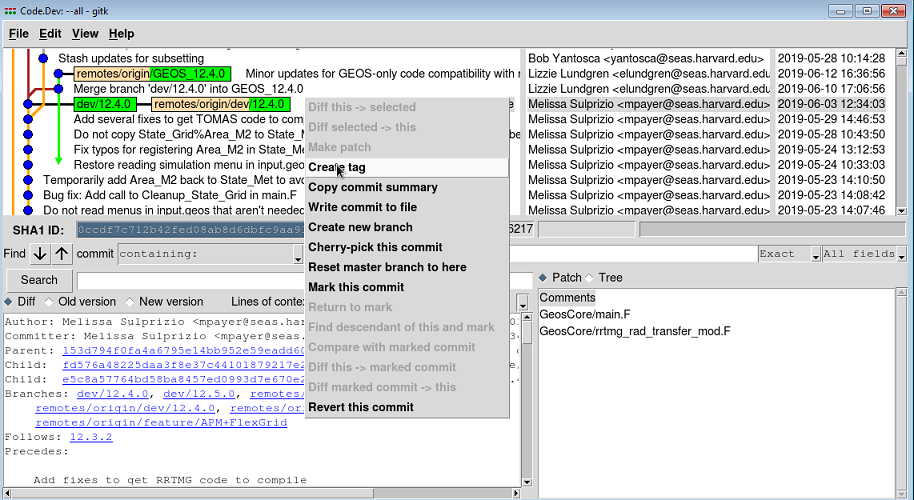
(2) Select the commit that you wish to tag by right-clicking on its name with your mouse. A context menu will appear:
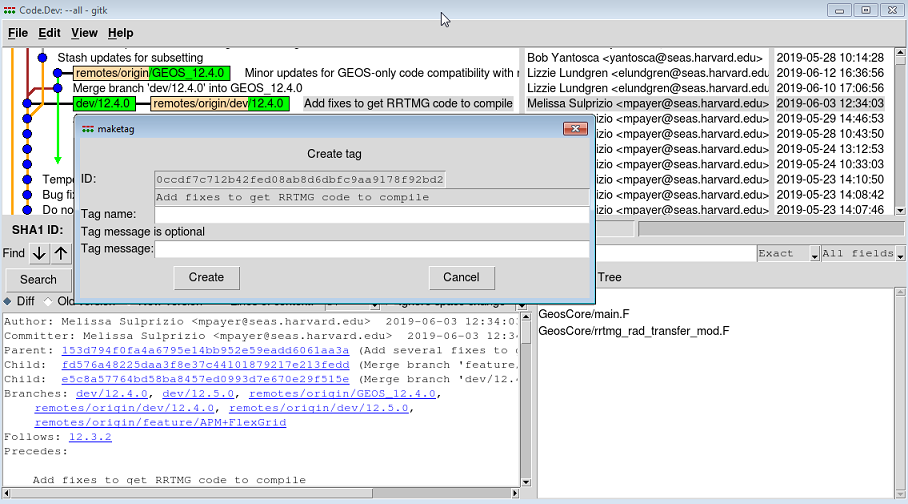
(3) Select the Create tag option. A dialog box will appear:
(4) Type the text for your tag the Tag name box.
(5) Click on Create. Your tag should appear as a yellow flag in the Gitk revision history window.
Create a tag from the command line
You can add a tag via the command line:
git tag GEOS-Chem TAG_NAME
That command will create a tag at the current commit.
Removing tags
You can remove a tag via the command line:
git tag -d TAG_NAME
Further reading
- Git tag (Official Git documentation)
- How to become a master of Git tags (DaftBlog)
- Create a tag in a Github repository (Stack Overflow)
Previous | Next | Guide to using Git with GEOS-Chem | Getting Started with GEOS-Chem | GEOS-Chem Main Page

