Branching
Previous | Next | Guide to using Git with GEOS-Chem | Getting Started with GEOS-Chem | GEOS-Chem Main Page
Overview
On this page, we describe how to create new branches with Git.
Creating branches
There are several ways that you can create new branches with Git.
Use Git Gui to create a new branch
1. Start git gui
git gui &
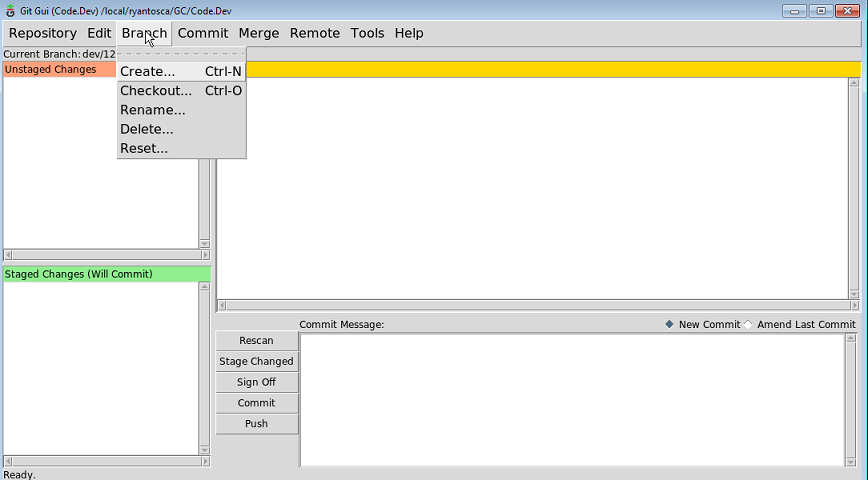
2. Go to the Branch/Create on the menu bar (or type CTRL-N).
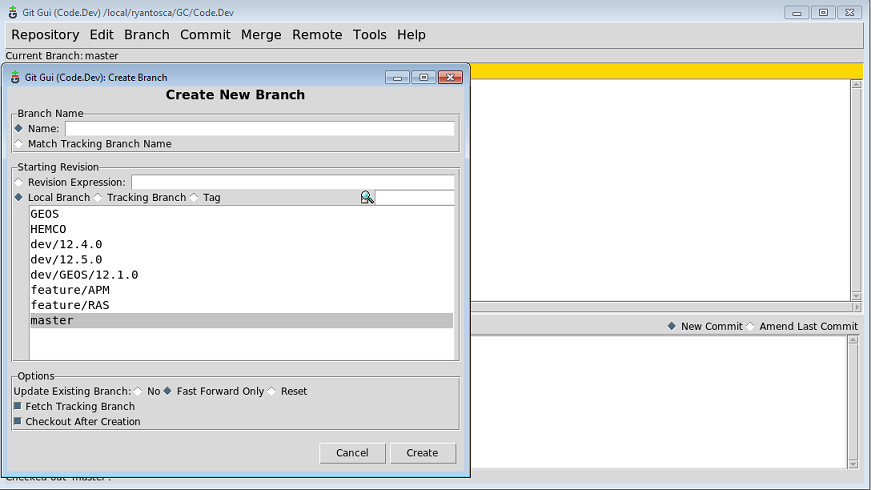
3. A dialog box will pop up. Type the name of the new branch that you wish to create. Your new branch name should adhere to the Gitflow nomenclature.
Git will automatically check out the new branch that you just created.
Use Gitk to create a new branch
You can also create a new branch very quickly from the Gitk browser.
1. Start gitk
gitk --all &
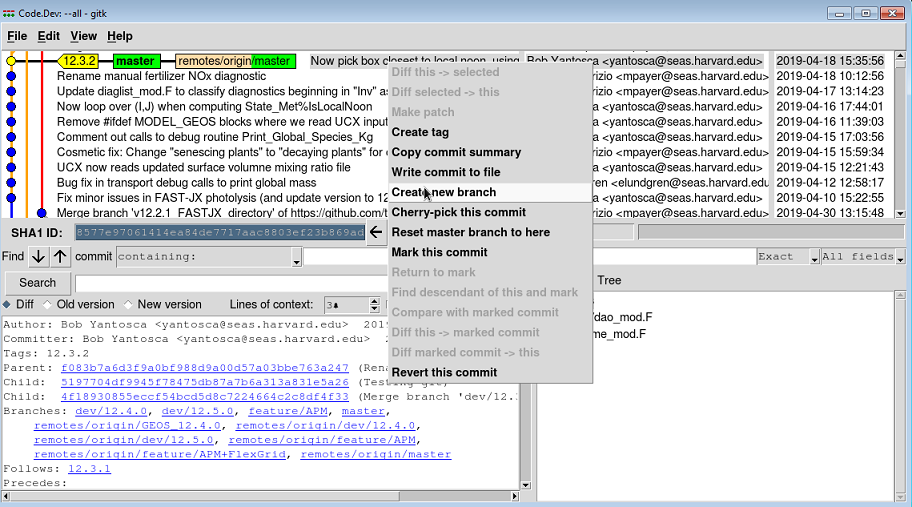
2. Move your mouse to the name of the commit from which you would like to create a new branch. Right-click on the name of that commit. This will pop open a context menu.
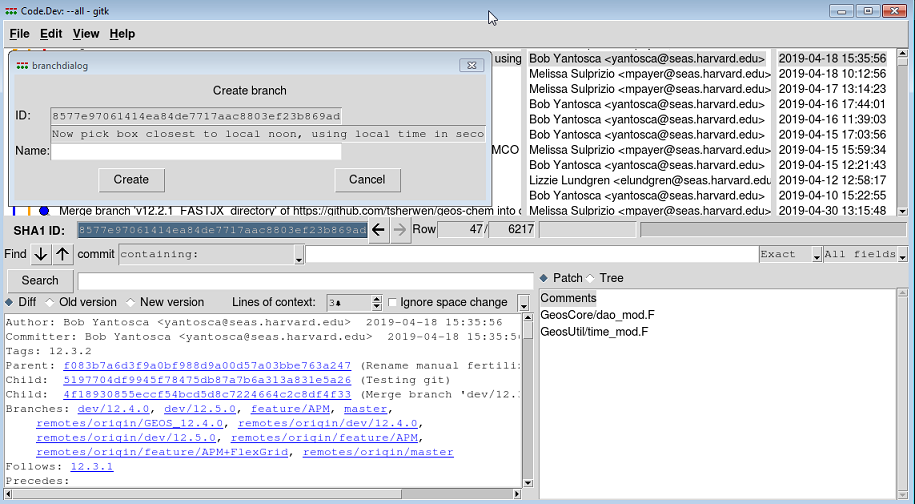
3. Select Create New Branch menu. This will pop open a dialog box that asks you to pick the name of the new branch.
4. Type the name for your branch and click on Create. Your new branch name should adhere to the Gitflow nomenclature.
Git will automatically check out the new branch that you just created.
Create a new branch from the command line
First, check out the branch that you wish to branch off from. In this case, let's branch off master.
git checkout master
If you are creating a new feature branch, then type:
git branch feature/NAME
git checkout feature/NAME
On the other hand, if you are creating a bugfix branch, then type:
git branch bugfix/NAME
git checkout bugfix/NAME
where NAME is to be the name of the feature or bug fix that you are implementing.
--Bob Yantosca (talk) 15:25, 20 June 2019 (UTC)
Switching between (aka "checking out") branches
Check out a branch with Git GUI
1. Start Git GUI
git gui &
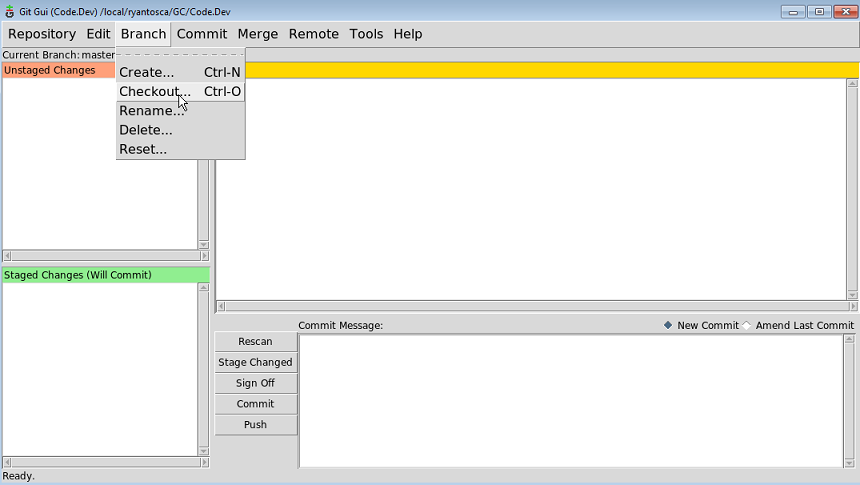
2. Click on the Branch/Checkout menu
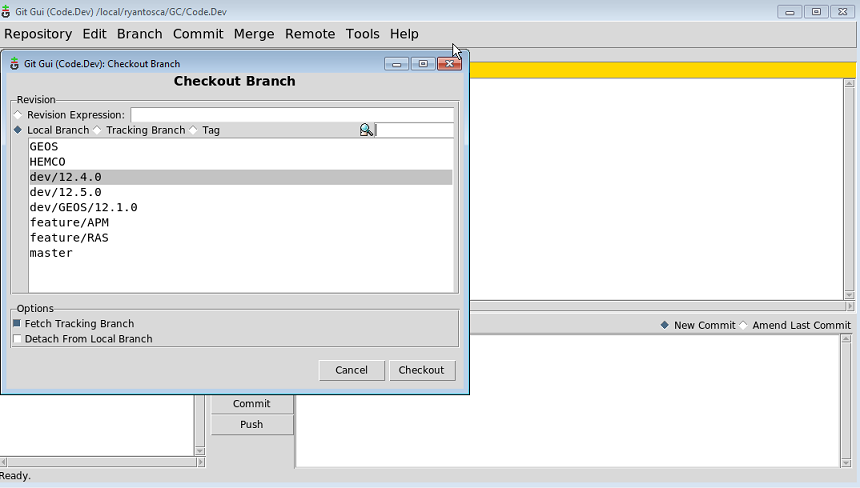
3. A dialog box will appear. Click on the name of the branch you would like to check out.
4. Click on Checkout.
Check out a branch with GitK
1. Start Gitk
gitk --all &
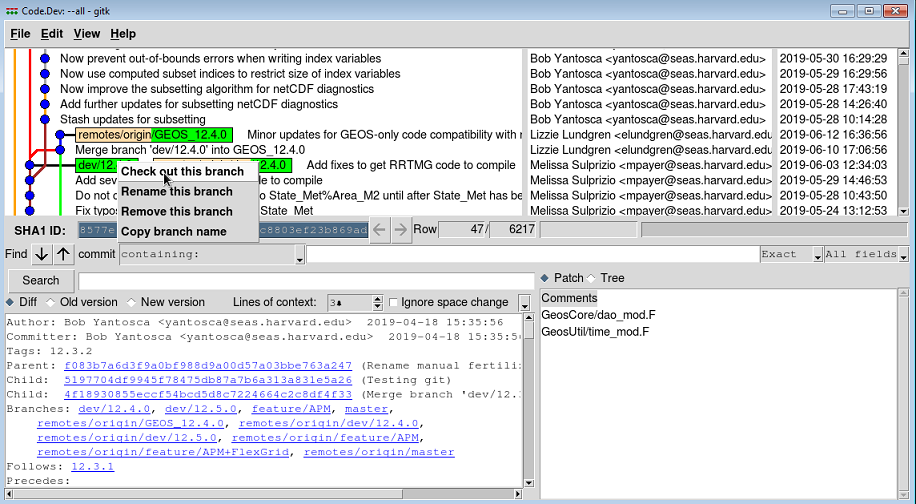
2. Right-click the GREEN BOX that correponds to the branch that you would like to check out. A context menu will appear:
3. Click on Check out this branch.
Check out a branches from the command line
To switch from the currently checked-out branch to a different branch, type:
git checkout BRANCH-NAME
Determining which branch is checked out
You can determine which branch is currently checked-out as follows:
| Using this: | Follow these steps: |
|---|---|
| Git GUI | Look at the top left (under the Repository menu), and you will see the name the branch that is currently checked-out. |
| Gitk | Look for the GREEN BOX with the boldfaced name inside. This indicates the branch that is currently checked-out. |
| The command line | Type:
git branch and you will see all of the branches: dev/12.4.0 *master The branch that is currently checked-out will have an * in front of it. |
Deleting branches
There are several ways that you can delete Git branches:
Deleting branches with Git GUI
1. Start Git GUI
git gui &
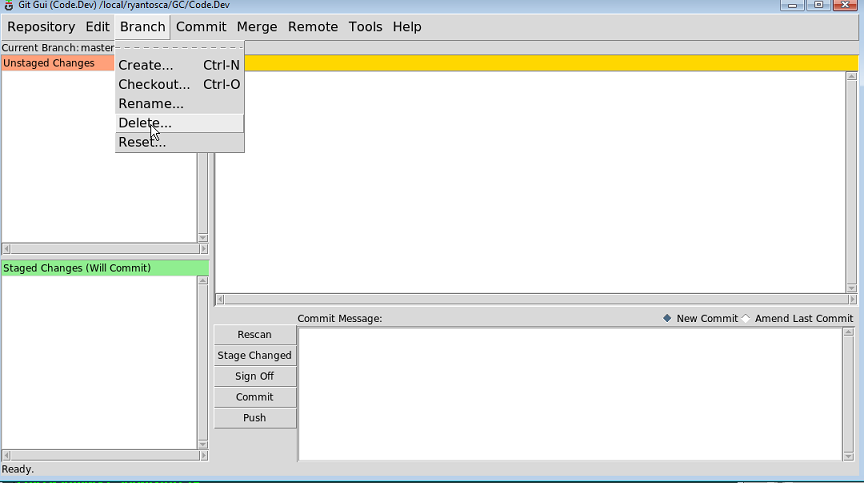
2. Select the Branch/Delete menu item.
3. A dialog box will pop up. Select the name of the branch that you wish to delete.
4. Click on Delete.
Deleting branches with Gitk
1. Start Gitk
gitk --all &
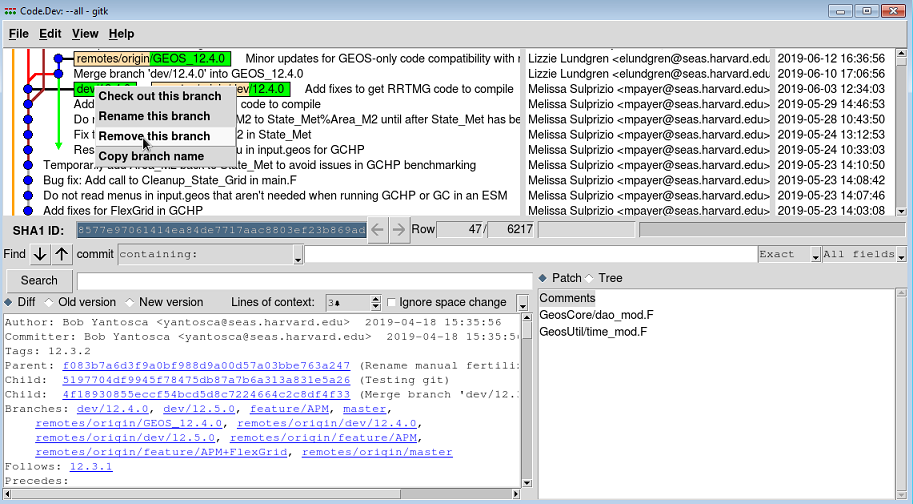
2. Right-click on the GREEN BOX that denotes the name of the branch that you wish to delete. A context menu will appear:
3. Click on Remove this branch.
Deleting branches from the command line
To remove a Git branch from the command line, type:
git branch -d BRANCH-NAME
Further reading
TBD
Previous | Next | Guide to using Git with GEOS-Chem | Getting Started with GEOS-Chem | GEOS-Chem Main Page
